Whenever I talk about growing curry leaves at home, I think back to my first curry leaf plant a tiny Murraya koenigii sapling gifted by a friend who called it kadhi patta, while another gardener from the South insisted it was sweet neem, and those early exchanges taught me how deeply this useful herb is rooted in both Indian and global kitchens. I learned that if you want to truly grow it well, you must treat it like a plant that naturally thrives in the right setup whether in pots, balconies, terraces, patios, or directly in the ground, especially in warm climates where just a little mindful care makes it flourish.
Grow Curry Leaves at Home: Simple Guide for Every Gardener
Over the years I’ve come to enjoy the routine of stepping outside to pluck fresh, aromatic, glossy leaves almost every single year, and this guide simply explains exactly how to grow curry leaves at home in containers or garden beds while adapting to both Indian and global growing conditions related to climate, soil, smart pruning, preventing pests, and timing your harvesting just right.
What Are Curry Leaves?
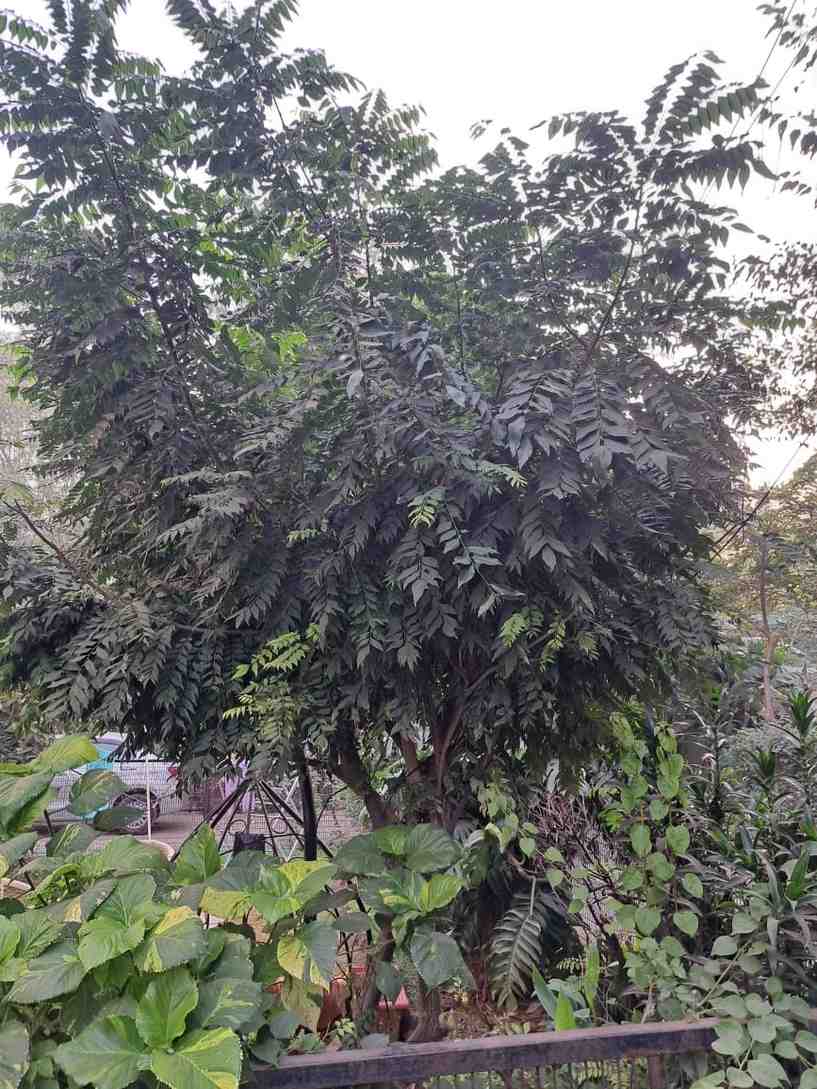
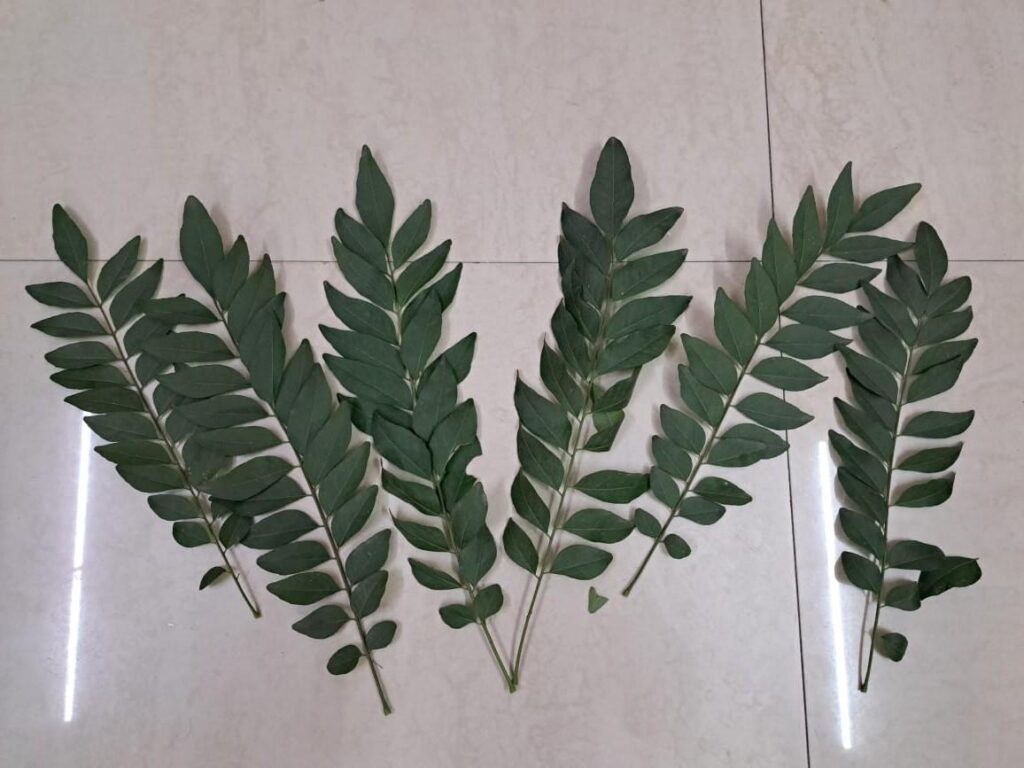
The curry leaf plant is a small, evergreen shrub or tree from the citrus family, originated in the Indian subcontinent, and I’ve always loved its glossy, pinnate leaves arranged in tidy rows on slender stems, especially because they become highly aromatic when crushed or tempered in hot oil, a fragrance that instantly feels like home.
-
A common garden plant that bears clusters of white, star shaped flowers which later turn into shiny, black berries.
-
The main culinary part is the leaf; fruits and seeds are generally not used in cooking and should not be eaten casually.
-
Sold under various names: curry tree, sweet neem, meethi neem, kadhi patta.
-
Botanically known as Murraya koenigii or Bergera koenigii.
-
Often confused with neem (Azadirachta indica) and the unrelated curry plant (Helichrysum italicum) which is grown mainly as an ornamental.
Curry Leaves vs Curry Powder vs “Curry Plant”
-
Many beginners assume curry leaves and curry powder are the same thing, but they are completely different, and I learned this while helping first-time gardeners understand why their dishes lacked depth.
-
Curry powder is a dry spice blend usually containing coriander, cumin, chilli, fenugreek, turmeric, and other spices depending on the region or brand.
-
Fresh or dried curry leaves are used mainly for tempering or tadka in Indian, Sri Lankan, and South Asian recipes such as dals, sambar, rasam, chutneys, vegetables, and curries, creating a depth of aroma no powder can match.
-
An ornamental plant commonly called the curry plant (Helichrysum italicum) has a silvery look and a curry like scent but is not the true herb used in cooking.
-
For authentic flavour, always grow and use Murraya koenigii, the genuine curry leaf plant.
Climate: Where Can You Grow Curry Leaves?
A major lesson from my own gardening experience is that understanding the climate is a key part of learning how to grow curry leaves successfully, because curry leaf plants truly love warm, tropical, and subtropical conditions and respond beautifully when kept in their comfort zone.
-
They grow best in temperatures between 20–35 °C.
-
Highly sensitive to frost.
-
Even light, brief cold spells may cause leaf drop.
-
Repeated or strong frost can kill the plant.
-

Grow Curry Leaves at Home: Simple Guide for Every Gardener
For Indian and South Asian Gardeners
For Indian and South Asian gardeners, the advantage is that most parts of India, Sri Lanka, and Bangladesh share similar climates that are naturally ideal to grow a curry leaf plant directly in the soil or in containers, allowing it to stay outdoors year round in frost free areas, and in my own experience these warm regions help the plant thrive with very little effort; but in colder hill regions or places with occasional frost, it’s always safer to keep the plant in pots so you can move the plants to protection during winter.
For Global Gardeners in Cooler Regions
-
Many global gardeners who live in cooler regions of temperate Europe and North America can still grow a curry leaf plant successfully by keeping it in a pot.
-
Place it outdoors during spring and summer in a sunny, sheltered spot for healthy growth.
-
Move the plant indoors, into a greenhouse, or a frost free conservatory before the first frost to protect it from cold damage.
-
The plant may slow down or drop some leaves in winter, which is normal.
-
It will bounce back once light and temperatures improve in early spring.
Types of Curry Leaf Plants
A lot of gardeners I speak to are surprised to learn that there are three main types of curry leaf plants often described in gardening resources, and choosing the right one depends entirely on your space and how much maintenance you’re comfortable with.
Regular Type
-
Fast growing, can reach 6–20 ft (2–6 m) in the open ground.
-
Classic variety with familiar leaves.
-
Type usually sold in markets.
-
Great if you’re willing to prune regularly.
Dwarf Type
-
Grows shorter and spreads more.
-
Light green, slightly longer leaflets.
-
Ideal for medium sized containers.
Gamthi Type
-
Very compact, slow growing.
-
Stays often around 30 cm (1 ft) tall.
-
Thick foliage with the strongest aroma.
-
Excellent for small balconies and indoor setups.
-
Preferred by most home gardeners as it’s easiest to manage in pots.
Best Place to Grow: Sunlight and Location
-
If you want to truly master how to grow curry leaves, start by focusing on getting the light right.
-
A curry leaf plant thrives in full sun.
-
Aim for least 4–6 hours of direct sunlight daily; 6–8 hours is ideal.
-
In very hot climates or exposed terraces, a little afternoon shade works well.
-
Extra protection is helpful for young plants in small pots.
Outdoors
-
Place your pot or plant in the sunniest part of the balcony, terrace, patio, or garden.
-
Avoid extremely windy spots, especially for young plants.
-
Wind can be harmful because the plant has a relatively weak trunk and branches.
Indoors (Winter or Apartment Gardening)
-
Choose the brightest south facing or west facing window in the northern hemisphere (or north facing in the southern hemisphere).
-
Rotate the pot every few weeks so all sides receive proper light.
-
Indoor environments may have poor lighting, so expect slower growth and some leaf drop.
-
The plant will bounce back when warmth returns.
Soil and Potting Mix for Curry Leaf Plants
-
Healthy roots are essential for vigorous top growth.
-
Aim for slightly acidic to neutral soil (pH 6.0–6.9).
-
Use a loose, airy mix that does not stay waterlogged.
Simple Potting Mix Recipe (Ideal for Indian and Global Terrace/Balcony Gardens)
A simple potting mix recipe that works beautifully for Indian and global terrace or balcony gardens is one I’ve refined over time, using ingredients that keep the soil airy and nutritious without holding excess moisture.
-
Use 50–60% garden soil or good quality topsoil.
-
Add 20–30% well rotted compost or farmyard manure.
-
Mix in 10–20% coarse sand or perlite for better drainage.
-
Optional additions: handful of neem cake, vermicompost, or bone meal.
-
These add slow release nutrients depending on your gardening style.
-
Avoid heavy clay or pure cocopeat without amendments, as both retain too much water around the roots. soil improvement methods.
Choosing the Right Container
When growing curry leaves in pots, the container matters just as much as the soil, so I usually start with an 8–10 inch (20–25 cm) pot for small plants or seedlings, then move the plant up to 12–14 inches, and finally to 16–18 inches as it becomes mature, making sure to keep it bushy by trimming the tips.
-
Ensure at least one large drainage hole (the more, the better).
-
Never allow the pot to stand in water for long periods.
-
Terracotta or unglazed clay is excellent for gardeners who tend to overwater.
-
These materials breathe and let soil dry faster.
-
Plastic pots work too, but watch moisture levels, especially in cool weather.
-
If you want a tall tree form, choose a wider, heavier, loam based mix so the pot does not topple over in wind.
How to Plant or Repot Curry Leaf Plants
Planting a New Curry Leaf Plant
Here’s the exact process I follow whenever I’m planting a new curry leaf plant, keeping everything simple and root-friendly.
-
Choose a healthy nursery sapling, well rooted cutting, or strong seedling.
-
Fill the pot with a prepared mix, leaving some space at the top.
-
Gently place the plant at the same depth as before do not bury the stem too deep.
-
Firm the soil lightly around the root ball.
-
Water the plant thoroughly until it drains from the bottom.
When and How to Repot
-
Repot in spring or early summer when the plant starts active growth.
-
Look for roots circling the bottom or soil that dries extremely fast a clear sign it’s time to go one pot size up.
-
For mature plants you want to keep in the same pot, remove one third of the old soil.
-
Trim some older roots and refill with fresh mix, then put the plant back.
-
Do repotting every 1–2 years to keep growth vigorous and reduce the risk of compacted or exhausted soil.
Watering: Keeping Soil Moist but Not Soggy
When it comes to watering curry leaf plants, I’ve learned that overwatering is one of the most common mistakes people make, because the key is keeping the soil consistently moist but never constantly wet, adjusting the schedule based on temperature, pot size, and weather.
-
Water thoroughly until excess drains from the bottom.
-
Allow the top 2–3 cm (about an inch) of soil to dry before watering again. watering plants correctly for fast growth.
-
In hot weather, potted plants may need water every 2–4 days depending on pot size, heat, and wind.
-
In cool, rainy conditions, reduce watering frequency.
-
Droopy, yellowing leaves or soil that stays heavy, mushy, or has a foul smell may indicate root rot and the need for repotting.
-
During winter semi dormancy, water much less it’s better to let the soil dry slightly rather than keep it standing in moisture.
Fertilizer and Organic Nutrition
From experience, curry leaf plants are moderate feeders that respond well to steady, not excessive, nutrition, especially during the growing season of spring and summer, and even most of the year in the tropics, as long as the feeding stays gentle and balanced.
-
Mix compost or well rotted manure into the soil during planting or repotting. best organic fertilizers for garden growth .
-
Apply a mild, balanced fertilizer every 4–6 weeks.
-
Prefer organic options like liquid vermicompost tea or low-dose NPK. vermicompost 7-day guide .
-
Alternatively incorporate slow release granular feed at half the recommended rate.
-
Start adding occasional light feeds during active growth.
-
Avoid heavy fertilizing in winter.
-
Very high nitrogen without balance can cause soft, pest prone foliage with less flavour.
Pruning and Shaping for Bushy Growth
If left unpruned, curry leaf plants naturally become tall, leggy, and sparse, so I make it a habit to pinch or trim the tips regularly because pruning really helps you get a compact, leaf rich plant that fits nicely in any balcony or kitchen garden, and it grows far more vigorously once shaped this way.
For Young Plants
-
When young plants reach about 15–20 cm in height, pinch off the growing tip.
-
This simple step encourages branching on the sides.
-
It creates a multi stemmed, bushy structure that supports stronger long-term growth.
For Established Plants
-
For established plants, regularly cut back long, lanky stems just above a leaf node.
-
This encourages side shoots to appear and keeps growth compact.
-
Remove dead, weak, and crossing branches to improve airflow.
-
Lightly shape the plant before moving it indoors for winter and again after when new growth begins.
-
Give priority to leaf production by removing flower buds during the first couple years.
-
This helps the plant put more energy into strong vegetative growth.
Seasonal Care and Overwintering
In Warm, Frost-Free Climates
-
In warm climates, curry leaf plants can stay outside all year.
-
Ensure good drainage during the monsoon season.
-
Do not let pots sit in water to avoid root problems.
-
Light pruning and regular harvesting will keep the plants in good shape.
In Areas With Cold Winters or Frost
-
In areas with cold winters or frost, grow curry plants in containers.
-
Move the plant indoors under protection before temperatures drop too low.
-
Place it in the brightest possible spot.
-
Expect slower growth and possible leaf drop in winter this is normal.
-
Reduce watering and stop fertilizing until spring.
-
As days lengthen and temperatures increase, the plant will push out fresh, tender shoots.
Common Pests and Problems
Although curry leaf plants are generally quite robust, I’ve noticed that certain pests tend to show up more often on plants kept in dry, indoor conditions or on container plants, especially when airflow is poor or the soil stays too wet, so monitoring the leaves regularly helps catch issues early before they spread.
Common Pests
Curry leaf plants attract a few common pests, and I’ve learned that catching them early makes all the difference. Most of these insects hide on tender parts of the plant, causing subtle damage at first, so I regularly inspect the leaves and stems especially in warm or dry conditions to prevent serious infestation.
Spider Mites
-
Tiny, often red or brown.
-
Found on undersides of leaves.
-
Cause fine stippling and light webbing.
Scale Insects
-
Small, shell like bumps on stems.
-
Suck plant sap.
-
Slow and weaken plant growth.
Mealybugs / Plant Lice / Psyllids
-
Appear as white, cottony masses.
-
Cluster on leaf nodes.
-
These insects weaken the plant over time. organic pest control methods.
Pest Identification
| Pest Name | Appearance | Where They Hide | Damage Caused |
|---|---|---|---|
| Spider mites | Tiny, red/brown, fine webbing | Undersides of leaves | Stippling, leaf stress |
| Scale insects | Small, shell like bumps | Stems | Suck sap, weaken stems |
| Mealybugs / Plant lice / Psyllids | White, cottony masses | Leaf nodes, tender shoots | Weaken plant, slow growth |
Management
-
Inspect the plant regularly, especially the undersides of leaves.
-
For light infestations, wipe pests with a damp cloth or spray them off with a strong jet of water.
-
Use insecticidal soap, horticultural oil, or safe homemade solutions for stronger infestations.
-
Apply appropriate repeated sprays 5–7 days apart, as products do not kill eggs in one go.
-
Increase humidity slightly around indoor plants to discourage spider mites.
Physiological Problems
-
Overwatering leads to droopy, yellow leaves and can cause root rot.
-
Very low light causes elongated, weak growth and leaf drop.
-
Sudden temperature changes such as moving a plant straight from hot sun to cold indoors can shock the plant.
-
Always shift conditions gradually when possible to avoid stress.
How to Propagate Curry Leaf Plant
Learning how to propagate a curry leaf plant feels like the natural next step once you know how to grow curry leaves successfully, and I’ve always enjoyed this part because it lets me multiply my plants and share them with friends, making the whole gardening journey even more rewarding through simple, healthy propagation practices.
1. From Self Seedlings
When a mature curry leaf plant produces berries and they fall into the pot, they often germinate near the base, and I usually wait until the seedlings grow a few inches tall with several leaves before I gently lift them and individually pot them into small containers, giving each one space to establish strong roots.
2. From Seeds
-
Use fresh, ripe seeds from healthy plants.
-
Remove the pulp and outer coating.
-
Sow in a moist, well drained seed mix.
-
Keep the pot warm, ideally around 20–30 °C.
-
Water lightly while waiting for germination.
-
Germination can take a few weeks, and rates may be variable.
3. From Stem Cuttings
-
Choose a semi hardwood cutting about 6–8 cm long from a healthy branch.
-
Remove the lower leaves, keeping only a couple at the top.
-
Optionally dip the cut end in rooting hormone.
-
Insert the cutting into a moist, well drained, soilless medium (e.g., cocopeat, perlite, sand).
-
Keep it warm in a bright, but not harshly sunny place.
-
Maintain light moisture while roots generally form in 3–6 weeks.
-
After rooting, transplant into a regular potting mix.
Harvesting and Using Curry Leaves
One of the great joys of knowing how to grow curry leaves is being able to harvest them fresh whenever you like, and once the plant is established and actively growing, gentle, regular picking keeps it healthy and productive.
-
Plucking individual leaflets or cutting small side branches works well.
-
Do not remove more than one third of foliage at once.
-
Regular, light harvesting actually encourages bushier growth.
-
For best fragrance and flavour, use fresh leaves.
-
To preserve extra leaves: air dry in shade and store in an airtight container.
-
Or freeze whole leaves in zip bags or ice cubes for later use.
-
Keeping the pot near the kitchen door or sunny windowsill makes it easy to pick what you need.
Growing curry leaves at home becomes truly rewarding once you understand their climate needs, the right soil and containers, proper watering, and how to prune, fertilize, and protect them from pests because with just a little consistent care, this hardy plant thrives beautifully in both Indian and global environments. Whether you’re nurturing seedlings, rooting cuttings, or shaping an older plant into a lush, bushy form, each step brings you closer to having a steady supply of fresh, aromatic leaves right at your doorstep. And as every home gardener eventually discovers, the real satisfaction comes not only from harvesting these fragrant leaves for your kitchen but also from watching a once-tiny sapling grow into a healthy, productive curry leaf plant that fits perfectly into your balcony, terrace, or indoor space.
FAQS
Is It Possible to Grow Curry Leaves at Home?
Yes, it’s absolutely possible the easiest way to get started is often when a curry leaf tree or someone with a mature plant has dropped seeds into a pot, and then young plants spring up on their own, which is exactly how I got mine; they’re surprisingly easy to grow from fresh seed, and it even makes it fun to share them with friends.
Can Curry Leaves Plants Survive Without Sunlight?
Can curry leaves plants survive without sunlight? Not really these plants love the sun and grow best in tropical and subtropical areas with lots of sunshine, and in my experience the most optimal growth requires 6–8 hours per day of direct sunlight, which is why shaded corners always lead to weaker, pale foliage.
Can You Grow Curry Leaf Plants Indoors?
Yes, you can grow curry leaf plants indoors if you recreate ideal growing conditions, because the curry leaf plant that I grew in Sydney thrives only in warm, sunny locations and requires at least 6–8 hours of direct sunlight daily for optimal growth, so when growing indoors, I always place it near a bright window or in a greenhouse like setting.
How to Grow Curry Leaves Faster at Home?
To make curry leaves grow faster, they need ample watering but should not go through long dry spells, so I water everyday only after receiving enough sunlight and always make sure to check the topsoil before adding more if it feels moist, not waterlogged, only then I add a little more moisture.
What Is the Best Fertilizer for Curry Leaves?
The best fertilizer for a curry leaf plant is a balanced, water soluble feed applied monthly, while diluted buttermilk or yogurt is a natural option that provides essential nutrients like nitrogen, phosphorus, and potassium, adds nourishment, and helps create the slightly acidic soil environment curry plants prefer, even helping deter pests and diseases.